Support > User Guides & Training Materials > Tutorials
Tutorial: Scope Action
Reporting the list of local groups and their members for a set of computers
This tutorial describes how to configure a Scope Action to scan the machines on your network and report the local group names and their members.
Solution
Let's create a scope action which reports this information.
-
Create a new scope action, define its name and click on Next.
-
Under Scope, select the Computers object type and define the list of machines to process (see: Defining the Scope). Click on Next.
-
Under Actions, double click on Add New to start the Action Module property window.
-
Under Execute the following Action(s), click on
Add/Remove > Report Computer Property > Local Account Database > Local Groups > NT Account Name -
Under Execute the following Action(s), click on
Add/Remove > Report Computer Property > Local Account Database > Local Groups > Members > NT Account Name -
Under Execute the following Action(s), click on
Add/Remove > Report Computer Property > Local Account Database > Local Groups > Members > Parent Container Name -
Click on OK. Click on Next.
-
The most convenient way to view the report is via an Excel spreadsheet. The following steps show how to configure your scope action so that the Excel spreadsheet is automatically opened after execution. If you do not have Excel on your machine, bypass these steps.
Under Execution and Output Settings:-
Set the Convert Output Data to Open with Microsoft Excel
-
Put a Check under Open Converted Report.
-
Put a Check under Close the Execution Window.
-
-
Complete your scope action definition.
Running the Scope Action
-
Select the newly created scope action and click on Run in the Ribbon Bar. The Execution Window opens.
-
Click the Start button in the Execution window and let the scope action run to completion.
The first time you run your scope action, the full set of machines as defined in the scope will be queried and a fresh set of output data will be generated. Once the scope action completed, Excel is automatically opened and prompts you to convert the XML data into an Excel Spreadsheet:
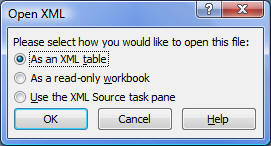
Select OK and OK again if further prompts are being displayed. The Excel spreadsheet then opens.
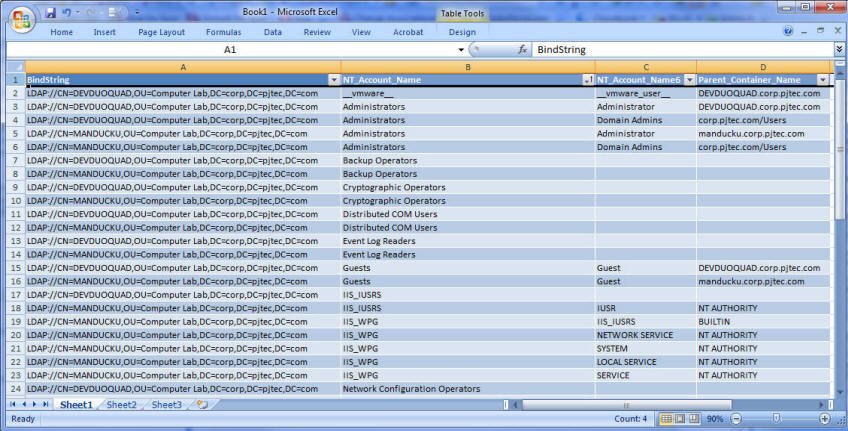
A lot of information is going to be displayed in this spreadsheet, however, you do not need most columns. Delete every column which is of no interest to you and only keep the columns that you selected to be reported. From there, you can further manipulate the data.
How to work with Failed Nodes
One or more targeted machines may have failed to be processed because they were off or some other reasons.
To view the list of failed nodes from the previous run, select your scope action and click on the View Last Run's Failed Objects button in the Ribbon Bar.
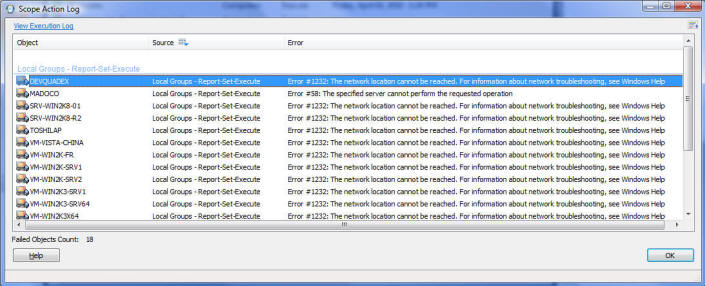
At a later time, you can re-run the Scope Action against these failed nodes. To do so, select your scope action, right-click on it and select Re-Run on Failed Objects. In this mode, only the objects which failed in the previous run are processed, and the new output data is consolidated with the previous data.
You can also schedule your scope action to re-run on failed objects on a periodical basis.
